November 2014 Update : We R Memory Keepers purchased the Lifestyle Crafts brand in 2013, and the L Letterpress is now branded as the Lifestyle Crafts Letterpress or the We R Memory Keepers Letterpress Platform. As far as I can tell, the platform has the same dimensions and setup as the L Letterpress, and you can find the We R Memory Keepers platform in several places on the internet, including Dick Blick and Scrapbook.com. If you don’t already own one, you’ll also need to purchase a manual die cutting machine, like the Evolution, to create letterpress prints.
In case you didn’t notice the update in the first part of my L Letterpress tool review, I actually went and purchased one. I got it for a 50% discount at A.C. Moore, and for that much less it was worth it to me to check it out. Plus, I needed something with which to test custom plates. Look for the custom photopolymer plate review later in this post, and many thanks to Boxcar Press, who generously sent me a custom photopolymer plate with which to test. Details about ordering custom plates from Boxcar also coming later in the post.
I’ll give you a little background on my experience with printing, specifically with a brayer and ink. Basically, I have none. I do some rubber stamping and stenciling, and neither of these involve a brayer, but I figure that I probably have a background typical of someone who’s in the market for one of these little machines.
Aside from adjusting Curves in Photoshop to make the photos a bit brighter, I have not altered any of the photos in the review because I wanted you to see them in all of their unsharpened glory.
Be warned, working with the ink and the brayer is messy! Before you begin, make sure that you have plenty of paper towels or rags on hand and, most importantly, that you have a good supply of something like baby wipes or Wet Ones, which is what I used to clean things up. Lifestyle Crafts sells cleaning towelettes to use with the machine, but my assumption is that they’re pretty much the same as the wipes that I mentioned.
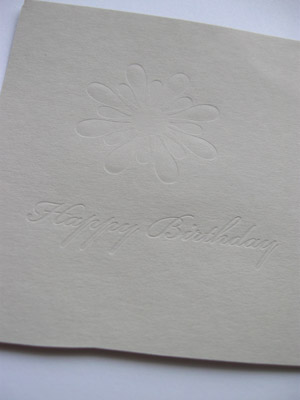
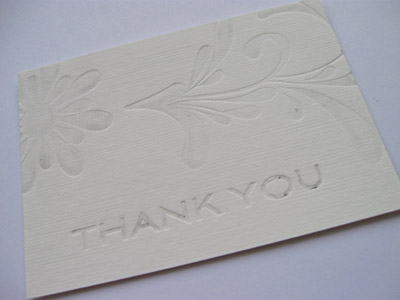
These are some of the standard “plates” that come with the L combo kit, pressed without ink on a piece of standard cardstock. I was pleasantly surprised by how crisp the lettering was:
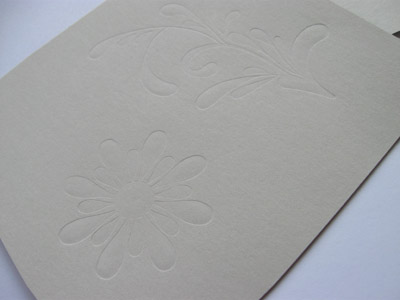
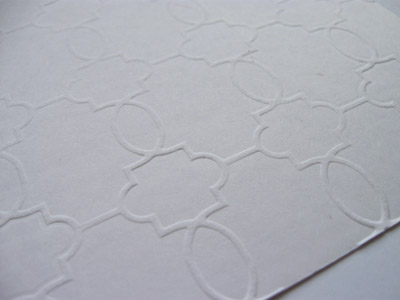
An example of the pattern plate that comes in the Everday printing set, pressed with no ink onto the very thick cardstock that comes with the combo kit. It was difficult to run this piece through the machine; the combination of the very thick cardstock and the plate was almost too much. I was a little scared that I was going to break the hand crank on the Epic Six tool, but I have to admit that it did come out rather nice:
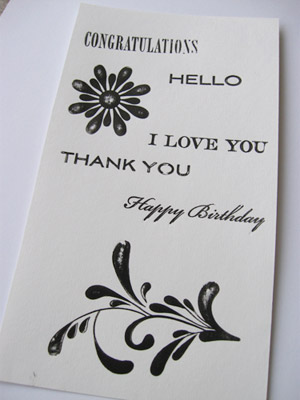
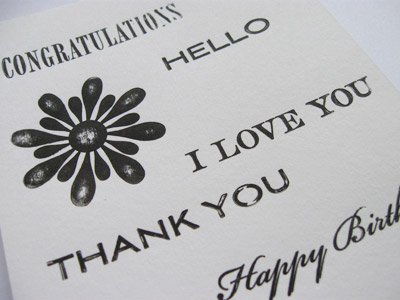
An example of most of the plates that come in the combo kit, inked with the black ink that comes with the L. As you can see, there’s very inconsistent ink coverage, especially on the non-type pieces. These were also printed on standard cardstock, and you can see the impression best in the third image:
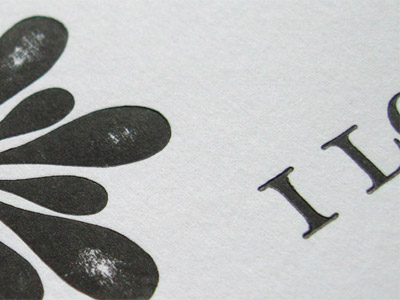
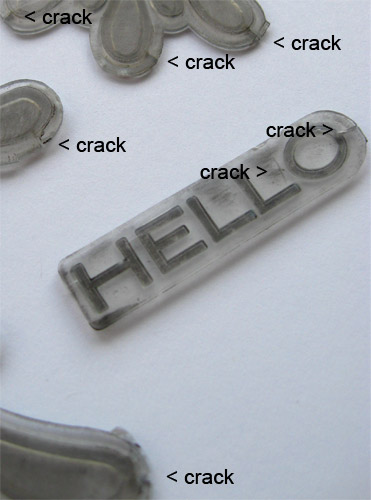
Things started to turn ugly when I went to wash the ink off the plates. Crack, crack, crack … I noticed cracks on many of the corners of the pieces, which don’t seem to stand up well at all to the pressure of being run through the Epic Six tool – the part that does the pressing. I had run them through less than half a dozen times when this photo was taken:
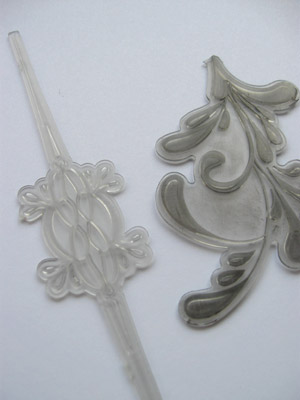
And, if you hadn’t noticed in the previous image, the ink doesn’t exactly wash off very well. I scrubbed and scrubbed with a Wet One, but the plastic pieces were permanently stained. I thought about taking some rubbing alcohol to them, but I didn’t want to damage the plastic even further. Here’s a before ink (left) and after ink (right) shot:
Not only that, but the next time I ran them through the machine, some of the ink that I was unable to get came off onto the paper:
Needless to say, I wasn’t very happy about this. I expected the plastic “plates” to last longer than a few runs, and the other printing sets that are sold for the L cost $25. Not inexpensive, and I’m apprehensive about using plates from the additional set that I purchased because I don’t want them to crack. It seems that I’m not the only one experiencing the cracking issue, as I found when I went to the QuicKutz forum.
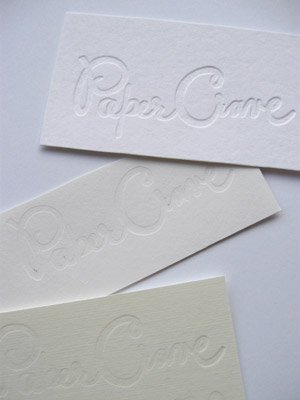
Now, for the custom photopolymer plates. The great news is that they work in the L tool, as a couple of you already confirmed in the comments and to me personally! Here are samples of the plate when pressed with no ink using the thick cardstock that comes with the L combo kit (top), regular cardstock (middle), and Strathmore Acrylic Linen Canvas paper on the non-canvas side (bottom):
Pretty exciting! But, unfortunately, I was unable to get good results when I started to use ink. Lots of muddiness, instead of a nice, crisp print. Here are samples pressed with the black ink that comes with the L combo kit onto regular cardstock (top), Strathmore Acrylic Linen Canvas paper on the non-canvas side (middle), and Strathmore Acrylic Linen Canvas paper on the canvas side (bottom):
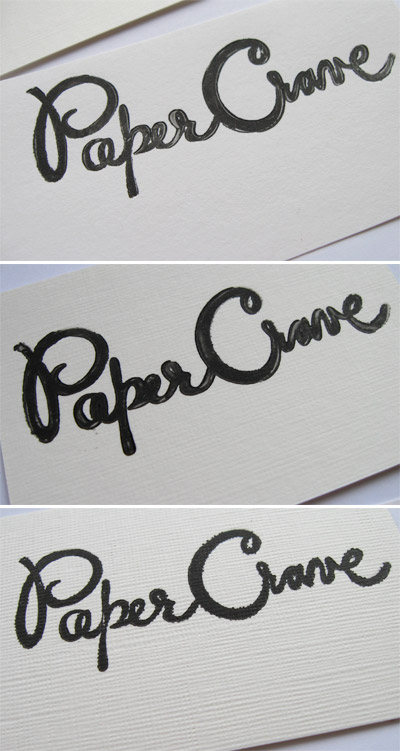
Stay with me, everyone, because there’s good news to come! Harold from Boxcar Press also has an L machine for testing, and he’s helped me understand why I was getting such muddy impressions with the custom plate. It seems that the tools supplied with the L Letterpress kit aren’t exactly conducive to getting great results, and if you use the tools that come with the kit then you will almost undoubtedly experience results similar to my own. In other words, you should probably repurpose the brayer as a paperweight or Christmas tree ornament because it’s not going to give you the desired results. However, here’s what Harold was able to achieve in very little time using a few tips and tricks of the printing trade:
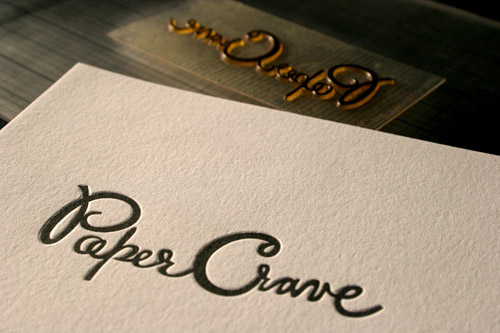
image courtesy of Harold Kyle / Boxcar Press
What a world of difference, huh? I was completely amazed by how excellent his results were. So, how did he do it? You can see the in depth explanation of his process on the Boxcar Press blog. There’s definitely some effort (as well as some trial and error for newbies like me) involved in getting a good print, but I think it’s worth it for great results. I’ll be posting my own results as soon as I’m able to get the additional supplies needed for testing with Harold’s technique.
If you’re interested in getting your own custom plates to work with, then I highly recommend Boxcar’s plates. They come with adhesive backing already on them, and you can reuse them time and again without worrying about them cracking or becoming stained. I even got soap and water on the adhesive, and afterward it still worked very well. My overall experience with the plates was excellent.
The plate style that you should request when ordering is KF152. Boxcar’s printmaking is charged by the square inch, $0.67 cents per square inch, with a minimum purchase of $30, which works out to roughly 45 square inches, or 8.5” x 5.25”. The plates are easily cut with scissors, and you can gang up your designs in the space in any which way you want and can cut them out to form separate plates. You can submit your files in Illustrator or InDesign formats, and PDFs are great, too. Read more about prepping files for Boxcar here.
Well, everyone, I hope that this has helped you make your decision about the L Letterpress. I also plan on using the tool in embossing an die cutting projects (pieces for doing both are included in the combo kit), which is an added bonus for me. And I’m super stoked about the fact that custom plates will work in the machine. Can you imagine the possibilities? I can’t wait to try out the new technique! On a final note, for this post at least, please beware of buying the plastic “plates” sold by Lifestyle Crafts for the tool, at least not until they figure out a way to stop them from cracking around the edges!
images, unless otherwise noted, are by Kristen Magee


