I’ve had baby showers on the brain in the months since I found out that my sister was going to have her first child, and the Russian nesting doll themed shower that Kathleen of Twig & Thistle put together for her sister is so irresistible that I’m really trying to fight the urge to squee. Squee! Sorry, I couldn’t hold it in any longer. Kathleen also shares the oh so cute banner from the shower and gives us a step-by-step for how to make our very own. Take it away, Kathleen!

I’m so excited to be visiting on Paper Crave today! When Kristen told me that she’d be out of town for her sister’s baby shower I thought it would be the perfect opportunity to share some details from my own sister’s recent baby shower. I illustrated, designed and letterpressed the invitations all around a russian stacking-doll theme. The illustrations are meant to look like my sister and her husband and their soon to be born baby boy!
To tie the invitation in with the shower, I used dusty blue and pops of yellow throughout the event. To dress up the space, I created a little banner that I hung above a table which read “Baby Leckie”. This would be perfect for any type of party really and it’s so simple! I’ve included a downloadable PDF with the whole alphabet in both Blue and Pink if you’d like to make your own. Simply print, cut and hang and you’ve got an instant customized party sign! Complete directions are below.
I’ve got more DIYs and details from the event on my blog Twig & Thistle and I’d love for you to come visit if you’d like. Thanks so much to Kristen for having me and happy planning to all of you!
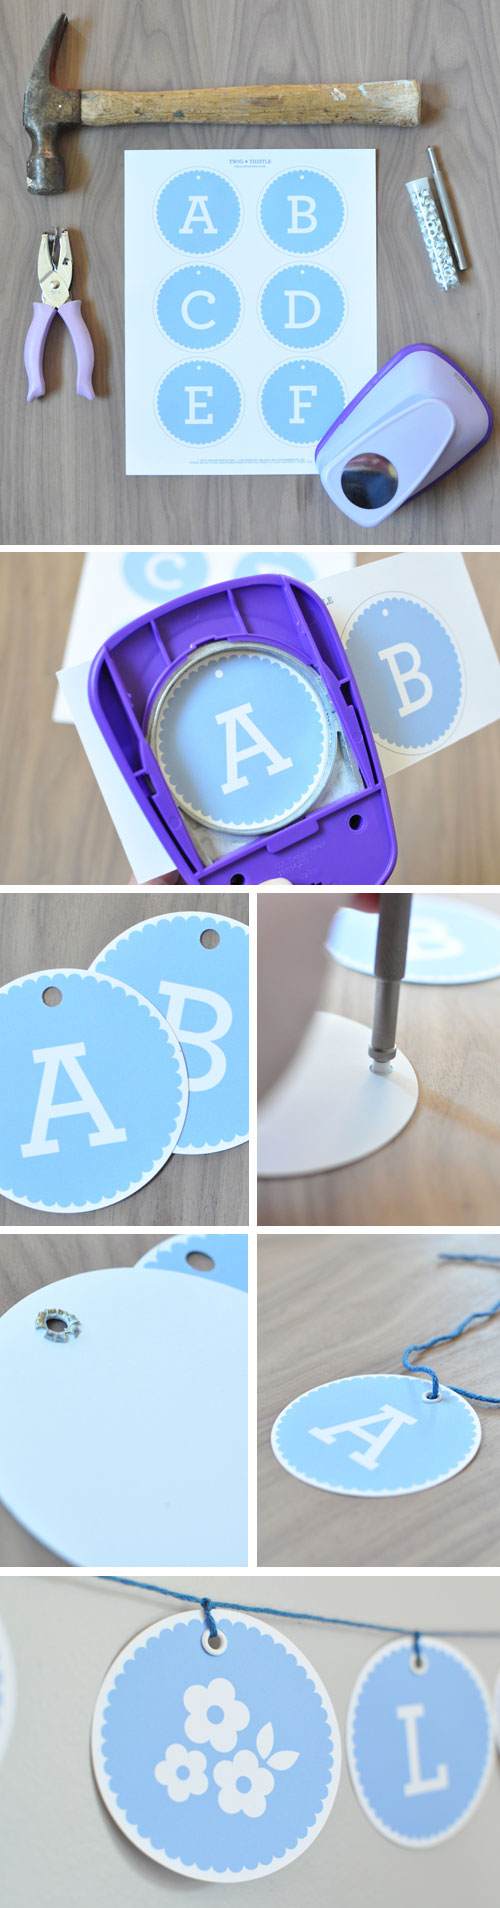
Materials Needed
3″ Circle Punch like this one from Marvy
Color Printer
Cardstock
1/8-1/4″ Craft Punch
Instructions
1. Download banner PDF (A-Z) in Blue or Pink and print onto card stock with a color printer. Trim each circle out using a 3″ circle punch taking extra care to line up the edges. If you don’t have a 3″ circle punch, then a craft knife can be used instead.
2. Punch holes with a craft punch where indicated. Add a little extra detail by threading a grommet through the hole. Follow instructions with grommet kit on how to attach to paper.
3. Once your phrase is all cut out, determine how far apart you want your letters to be. I spaced mine about 4″ apart. Thread a piece of twine or ribbon through holes making sure to secure each one with a knot to prevent sliding then hang!
images from Twig & Thistle


